Fall Wedding Series

Check out my weekly posts featuring projects from my wedding last fall!

My Etsy Shop

Check out the items I have for sale in my shop!

Most Repined on Pinterest

Check out my most popular pin on Pinterest, a cupcake stand!

Friday, October 25, 2013

Fall Wedding Series #6 - The Candy Buffet Table

As the favors for our wedding, we decided to set up a candy buffet! It was also around Halloween so I thought it would be nice for everyone to get a chance to trick or treat!


I collected lots of fun jars to use to hold the candy.  I wrapped them in teal ribbon (held with double-sided tape), tied on some jute string, and hot-glued some wood hearts with the candies' names on them. I choose candy in "fall colors."


For the favor bags, I bought small brown paper bags. I cut out hearts using a heart hole punch. Then I used stamps that had a mason jar and "Thank You." I would dip them in gold ink, then teal, and then stamp the bags. It created a shimmery teal look!


Everyone seemed to enjoy the buffet! We didn't have a lot of candy left over!


Check out my other Fall Wedding Series posts here: http://createsharerepeat.blogspot.com/search/label/Wedding

Wedding pictures taken by Janey Pie Photography.


Thursday, October 10, 2013

Fall Wedding Series #5 - The Welcome Table

At my wedding, one of the tables I had was the Welcome Table. On this table I chose to have my bridal picture, guestbook, bubbles, etc.

(Unfortunately, I don't have a photo of the whole table. You can't see the "Welcome" burlap pendant banner, but it is similar to the one on my Cake Table!)


I decided to make my own frame for my bridal photo. I bought a plain frame and some sticks. I hot glued the sticks onto the frame. I cut out some burlap to use for the matting.

Before and After


For the bubbles, I came across a little bird cage to put them in that I spray painted gold, added a wooden heart with "Bubbles" written on it, and placed some moss at the bottom. I spruced up the bubbles by adding some jute string with a little heart cut of recycled brown paper with a hole punched in the middle.


My guestbook was my favorite item on the table! I decided to use a wood round that everyone would sign with a permanent marker. I used a wood burning tool to draw the heart and initials in the middle. The wood round looks great displayed in our home now!


Above the table, we displayed some photographs with some jute string and clothespins! 


Check out my other Fall Wedding Series posts here: http://createsharerepeat.blogspot.com/search/label/Wedding

Wedding pictures taken by Janey Pie Photography.


Wednesday, October 2, 2013

Fall Wedding Series #4 - The Cake and Present Tables

A lot of my wedding decor planning focused on the several different tables I had at the wedding. They were the cake table, present table, welcome table and candy buffet/favor table. This post and the next two are dedicated to these tables.

The Cake Table


All the tables had an ivory tablecloth, a burlap runner and burlap pendant banners.

I made a pendant template out of paper  and used it to trace out pendants on a long piece of burlap.


After I cut the pendants out and ironed them to make them flat, I used some stencils I found at the store, and with teal paint, I sponged the letters on to the pendants. 


 After the letters were dry, I used a glue gun and a long piece of jute string to put the banner together.


Finished banner! (I will write about the Welcome table in my next blog post!)


The Cake


The cake was made by Ambrosia Bakery. They did a beautiful job! The top and bottom layer was a chocolate cake with coconut filling, and the middle was a white cake with strawberry cream cheese filling. All was covered in buttercream icing. SO YUMMY! I can't wait to defrost the top layer for our anniversary! The decorations match our wedding invitation: the leaves, vines and heart at the top. The only problem I had is that the gold of the vines were not exactly the gold color we discussed.. I wanted it more of a browner color gold. But that's okay. It was still amazing!

The topper was a heart that I bought that I burned our initials into.


 The base was a huuuuuge wood round that I bought off of Etsy!


The Groom's Cake was made by my good friend Andrea. She made us a football field with Will's two favorite teams, his work logo in the middle, and a couple of lego figures I had made in our likeness! 


Other Cake Table Details


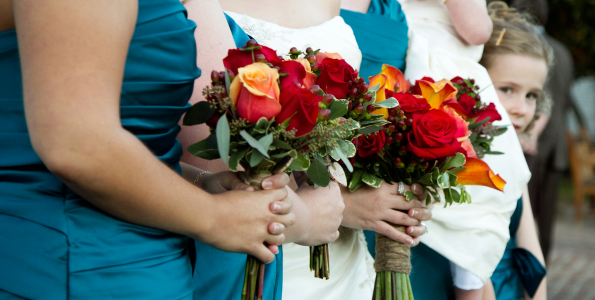
I also had lots of mason jars, our bouquets and champagne flutes on the table. The large pumpkin to the right was hallowed and had an opening that was supposed to hold the champagne, but they forgot to put the bottle in there. No biggie!

All the bouquets had a mason jar to hold them up around the cake. Each had a teal ribbon and jute string around it and a heart with the owner's initials.


I had these beautiful napkins made for the table as well! You can find them HERE.


The Present Table


Our wedding location had this cute little wood table that I decided to use for the present table. We decorated it with a banner, burlap runner, flowers, and a bird's cage on top of a wood round to hold cards. I wrapped it with ribbon and jute string and placed a heart that said "Cards" on it. I also had some moss at the bottom.


That's it for now! More tables to come! 

Check out my other Fall Wedding Series posts here: http://createsharerepeat.blogspot.com/search/label/Wedding

Wedding pictures taken by Janey Pie Photography.


Thursday, September 19, 2013

Fall Wedding Series #3 - Pumpkins, Burlap and Mason Jars

For my fall, rustic themed wedding, I concentrated on what elements I could use in my decorating that would match the theme and location. The wedding took place at Magnolia Mound Plantation. The ceremony was on the back steps of the plantation home, and the reception was under the pavilion. The pavilion is open on three sides and has a barn feel to it. So all my decor decisions were to enhance this already beautiful location. 

The Ceremony


The Pavilion 


I wasn't interested in having a bunch of flowers as decorations. I liked the idea of having pumpkins, but that seemed TOO fall for what I wanted. But then late one night the image of WHITE pumpkins popped into my head. Did I make it up, or are there white pumpkins? Sure enough, there are! So I had the brilliant idea that my husband (at that time fiancé) and I would GROW our own white pumpkins. Well... that didn't work out so well. The plants started off well enough, but the area we grew the plants in flooded a lot so all our plants died. Then I decided that we would buy white pumpkins. When pumpkins started coming out in stores, all the white ones were very ugly. They had brown spots on them. What to do!? I just HAD to have white pumpkins. And I did....

We PAINTED them white!!!


A couple of weeks before the wedding, we went to the store and bought LOTS of regular ol' orange pumpkins. We cleaned them off with a wet cloth and wrapped the stems with painters' tape. Then we took many cans of ivory colored spray paint (Not pure white. It wouldn't look natural too white!) and painted all the pumpkins! We painted some of the smaller pumpkins gold. We dusted the tops of the white pumpkins with some gold glitter spray paint. The gold glitter made a beautiful, shimmery effect. The pictures don't do them justice! :)


My car FULL of pumpkins!


A couple did end up rotting before the wedding, but we bought extra for that reason! :)

We used the pumpkins as centerpieces for the guests' tables and as accents all around the ceremony and reception areas. I also used lots of burlap and mason jars. I bought a large roll of burlap to make table runners for all the tables. We also had burlap bows in various places. Mason jars in a range of sizes were placed on all the tables in the reception area. Some had teal blue candles and gold glass pieces in some, while others had floating gold candles and moss.


Bows made by my mom (she is the best bow maker) using wired burlap ribbon.

I tied the ends of all the runners with a jute string bow.

And of course... the WHOLE family had to "help." :)


Check out my other Fall Wedding Series posts here: http://createsharerepeat.blogspot.com/search/label/Wedding

Wedding pictures taken by Janey Pie Photography.


Monday, September 16, 2013

Fall Wedding Series #2 - The Wedding Party, Colors and Flowers

This post is dedicated to the colors I choose for the wedding. There were two deciding factors: 1) I wanted "fall" without being overly "fall"... in other words, I didn't want it to be overly orange... no fall leaves, no orange pumpkins. Our wedding was around Halloween so I didn't want it to look like a Halloween wedding. 2) I wanted to use our favorite color which is blue.

After tons of research, I believe I came up with a great color palette! At first I was looking at more of a navy blue, but it never quite seemed right. But then I came across a dark, blue teal, and I fell in love! So it became my main color. The main items that would be this dark, blue teal color were the bridesmaids' dresses. I came across the fabric color "Tealness" from Alfred Angelo. It was the perfect shade! The groomsmen had matching ties from Al's Formal Wear.

*Note* It is REALLY hard to match this blue teal color.  Everyone's definition of teal can be different! I had to get creative to make sure everything matched. My advice is to make sure to always bring a sample of the fabric of your bridesmaids' dresses with you everywhere! I found that Hobby Lobby had the perfect ribbon to match Alfred Angelo's "Tealness." You can find it here: Teal Ribbon

Even though I didn't want a lot of orangey, fall colors, I thought I would tie some in with the bouquets. The oranges, yellows and reds really popped against the teal. It came out gorgeous in pictures!

I also had accents of ivories, beiges and golds. Those colors will be seen more in the my Fall Wedding Series posts to come!

 Pictures were taken by Janey Pie Photography.
 Bouquets were made by Billy Heroman's.


The bouquets were bound together with jute string. I added little wooden hearts with our names as well.


For the flower girl basket, I decided to jazz up a little basket I found at The World Market.


I wrapped some blue teal ribbon around the handle of the basket.
I made a flower out of burlap and added it and a jute string bow to the handle.


Here are some pictures of my husband and I... just for fun. :)


41 days until our 1st year anniversary! I love him so much! :)


Check out my other Fall Wedding Series posts here: http://createsharerepeat.blogspot.com/search/label/Wedding